Blogger's Layout feature is an easy-to-use template editing feature that will allow you to edit and customize your Blogger template without any knowledge of HTML or CSS. You can now easily edit and customize the colors, fonts, header and sidebar of your blog with a few clicks of the mouse. To customize your blog's layout, go to the Template | Page Elements tab in Blogger. 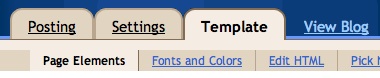
If you are using a classic template and would like to use the Layout feature, see our help article here for instructions on how to switch.
Moving elements in your template
How to arrange elements in your template
You can arrange the elements in your template the way you want them displayed. Simply click on the element you would like to move and drag and drop the element where you want it to be. You can move your page elements to the bottom of the page, anywhere in your sidebar, or below or above your blog posts. (Note: you can move all elements except your navbar, blog posts and header in some templates.) 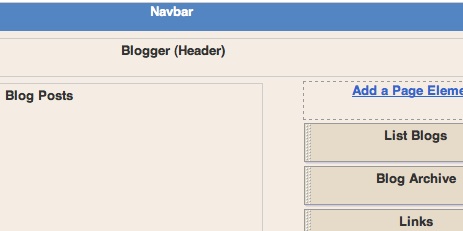
Editing elements in your template
How to edit your navbar
Clicking "Edit" in your Navbar section will allow you to select the color you would like your Navbar to be.
How to edit your header
Clicking "Edit" in your header section will allow you to add or edit the header of your blog, which includes your blog title and blog description.
How to edit your blog posts
Clicking "Edit" in your blog posts section will allow you to choose the number of posts you would like to display on your main page. You can choose either the number of days with posts to display or the total number of posts on the main page. You also have the option to show email post links that let your visitors easily email posts from your blog to their friends.
How to edit your profile
Clicking "Edit" in your profile section will allow you to edit/add your profile title, "About Me" description, and location.
How to edit your blog archive
Clicking "Edit" in your blog archive section will allow you to edit/add your blog archive title, select your display style (hierarchy, flat list or dropdown menu), choose to display post titles, choose to display oldest posts first, choose your archive frequency (monthly, weekly or daily) and choose your date format.
How to add a page element
You can add several page elements to your blog page or sidebar by clicking on "Add a Page Element". This will open a pop-up window that will allow you to add the following elements to your blog by clicking "Add to Blog" in the desired element section:
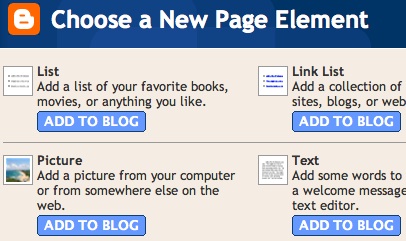
List
You can add a list to your blog with the ability to add a title, select the number of items to display, sort your list alphabetically and add links to your list elements.
Link List
You can add a link list to your blog with the ability to add a link list title, select the number of items to display and sort your link list alphabetically.
Labels
This will add a list of all the labels you've used on your posts. Clicking each one will take you to a page showing all the posts with that label. You can change the title of the list, and sort it alphabetically or by frequency of use.
Picture
You can add a picture from your computer or the web to your blog. You can also add a title and caption to your picture and shrink the picture to fit into your blog perfectly.
Text
You can add some text to your blog (such as a welcome message or footnote) with our rich text editor.
HTML/JavaScript
You can add third-party functionality or other HTML/JavaScript code to your blog.
Feed
You can add content from a site feed to your blog by first entering the feed URL and clicking "Continue." You will then be able to add a title, select the number of items to show (up to 5 max.) and display the item dates and/or authors by selecting the appropriate check boxes.
Logo
You can add one of our stylish Blogger logos to your blog.
http://help.blogger.com/bin/answer.py?answer=43708&topic=10274


